Groove connection installation process simplicity and efficiency combined
Groove connection, as an emerging pipeline connection technology, has gained wide recognition due to its simple and efficient installation process. In this article, we will introduce the installation steps of Groove connection, including preparation, grooving, hole drilling, installation of mechanical tees and crosses, pipeline installation, and system pressure testing. By following these steps, you can easily master the installation process of Groove connection and enjoy a seamless pipeline connection experience.
Installation Preparation:
1.Check the perforating machine, grooving machine, and pipe cutting machine to ensure safe operation.
2.Prepare the necessary materials and tools, including pipes, steel measuring tape, wrenches, calipers, spirit level, tape measure, lubricant, wooden mallet, scaffolding, etc.
3.Install the pipe supports and hangers according to the design requirements.
Grooving:
1 .Use the pipe cutting machine to cut the steel pipe to the required length and check the cut surface with a spirit level to ensure it is perpendicular to the pipe’s central axis. Smooth any burrs using a grinding wheel if necessary.
2 .Set up the steel pipe on the grooving machine and its tailstock, ensuring the pipe is in a horizontal position using a spirit level.
3.Align the end of the steel pipe with the grooving machine, making sure the pipe’s central axis is perpendicular to the groove rollers.
4.Slowly apply pressure with a jack to bring the upper pressure wheel into contact with the steel pipe. Start the grooving machine and let the groove rollers complete one rotation. During this process, observe whether the pipe surface remains in contact with the grooving machine. If not, adjust the pipe until it is level. If it is in contact, gradually lower the jack to evenly roll the steel pipe to the desired groove depth.
5.Stop the machine and use a caliper to check the groove depth and width. Once it meets the standard requirements, release the jack and remove the steel pipe.
Hole Drilling and Installation of Mechanical Tees and Crosses:
1.Mark the joint branch hole positions on the steel pipe.
2.Fix the chain hole drilling machine at the designated hole position on the pipe.
3.Start the electric motor and slowly approach the steel pipe with the drilling bit, applying lubricant at the drilling location to protect the bit. Complete the hole drilling on the steel pipe.
4.Stop the machine, remove the drilling machine, clean any metal debris and residue from the drilled hole, and use a grinding wheel to smooth the hole.
5.Place the clamp on the steel pipe, ensuring that the mechanical tee or cross aligns with the hole. Install the rubber seal ring evenly around the hole, and tighten the bolts securely.
6.For mechanical crosses, ensure that the holes on both sides of the steel pipe are concentric during drilling to avoid rubber ring damage and water flow area reduction after installation.

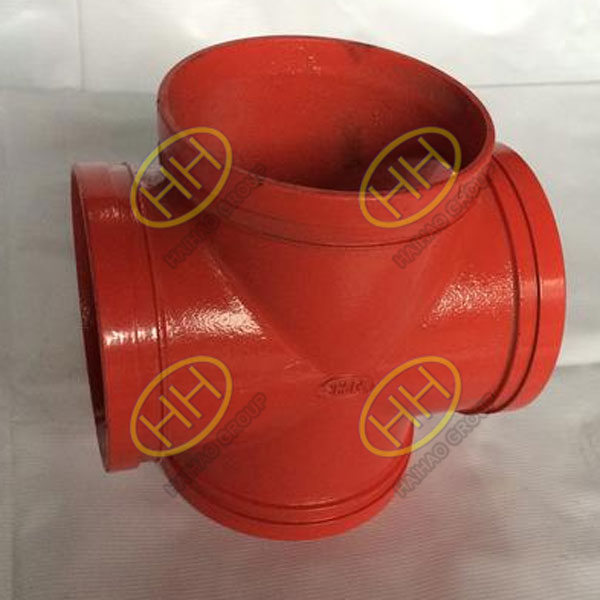
Groove connection pipe cross
Pipeline Installation:
1.Secure the steel pipe on the supports and hangers, and place an undamaged rubber seal ring on one end of the pipe.
2.Insert the other end of the pipe, which has been coated with lubricant, into the rubber seal ring. Rotate the rubber seal ring to position it in the middle of the joint.
3.Install the upper and lower clamps on the outer side of the rubber seal ring. Push the protruding edge of the clamp into the groove and firmly press the ears of the clamp. Insert the bolts and evenly tighten the nuts while using a wooden mallet to tap the clamp during the tightening process, ensuring that the rubber seal ring remains smooth and the protruding edge is fully inserted into the groove.
4 .Additional supports and hangers should be added within 500mm of rigid clamp joints.
System Pressure Testing:
Once the pipeline installation is complete, perform a system pressure test. Before conducting the test, comprehensively check all installed components and fixed supports to ensure everything is in place. If the installed pipeline sags, additional supports should be added. Minor sagging will naturally disappear when the internal pressure of the pipeline increases.
The groove connection installation process offers a convenient and efficient way to connect pipelines. By following the steps of preparation, grooving, hole drilling, mechanical tee and cross installation, pipeline installation, and system pressure testing, you can ensure a smooth and reliable pipeline connection. Embrace the simplicity and effectiveness of Groove connection and enjoy the benefits it brings to your pipeline projects.
